

Set up Firebase integration
Integrating Firebase with DragBuilder allows you to add powerful backend services to your app, such as authentication, real-time databases, cloud storage, and more. This guide will walk you through the basic steps to set up Firebase in your DragBuilder project.
Prerequisites
- DragBuilder Installed: Ensure you have the latest version of DragBuilder.
- Firebase Account: You have a Google account and access to the Firebase Console.
Steps to Set Up Firebase in DragBuilder
Step 1: Create a Firebase Project
- Go to the Firebase Console.
- Click on “Add project” or “Create a project”.
- Enter a project name and follow the on-screen instructions to create your Firebase project.
Step 2: Obtain Your Firebase Project ID
- In the Firebase Console, navigate to your project’s Settings:
- Click on the gear icon next to “Project Overview”.
- Select “Project settings” from the dropdown.
- Under the “Your project” section, locate and copy your Project ID.
Step 3: Configure Firebase in DragBuilder
- Open your DragBuilder project.
- Navigate to Settings > Firebase in the DragBuilder menu.
- Paste the Project ID you copied from Firebase into the Project ID field.
- Click “Connect” to link your DragBuilder project with Firebase.
Connecting to the Firebase project may require additional permissions broader than those needed for signing in with DragBuilder. This step may require you to open your browser and grant additional scopes.
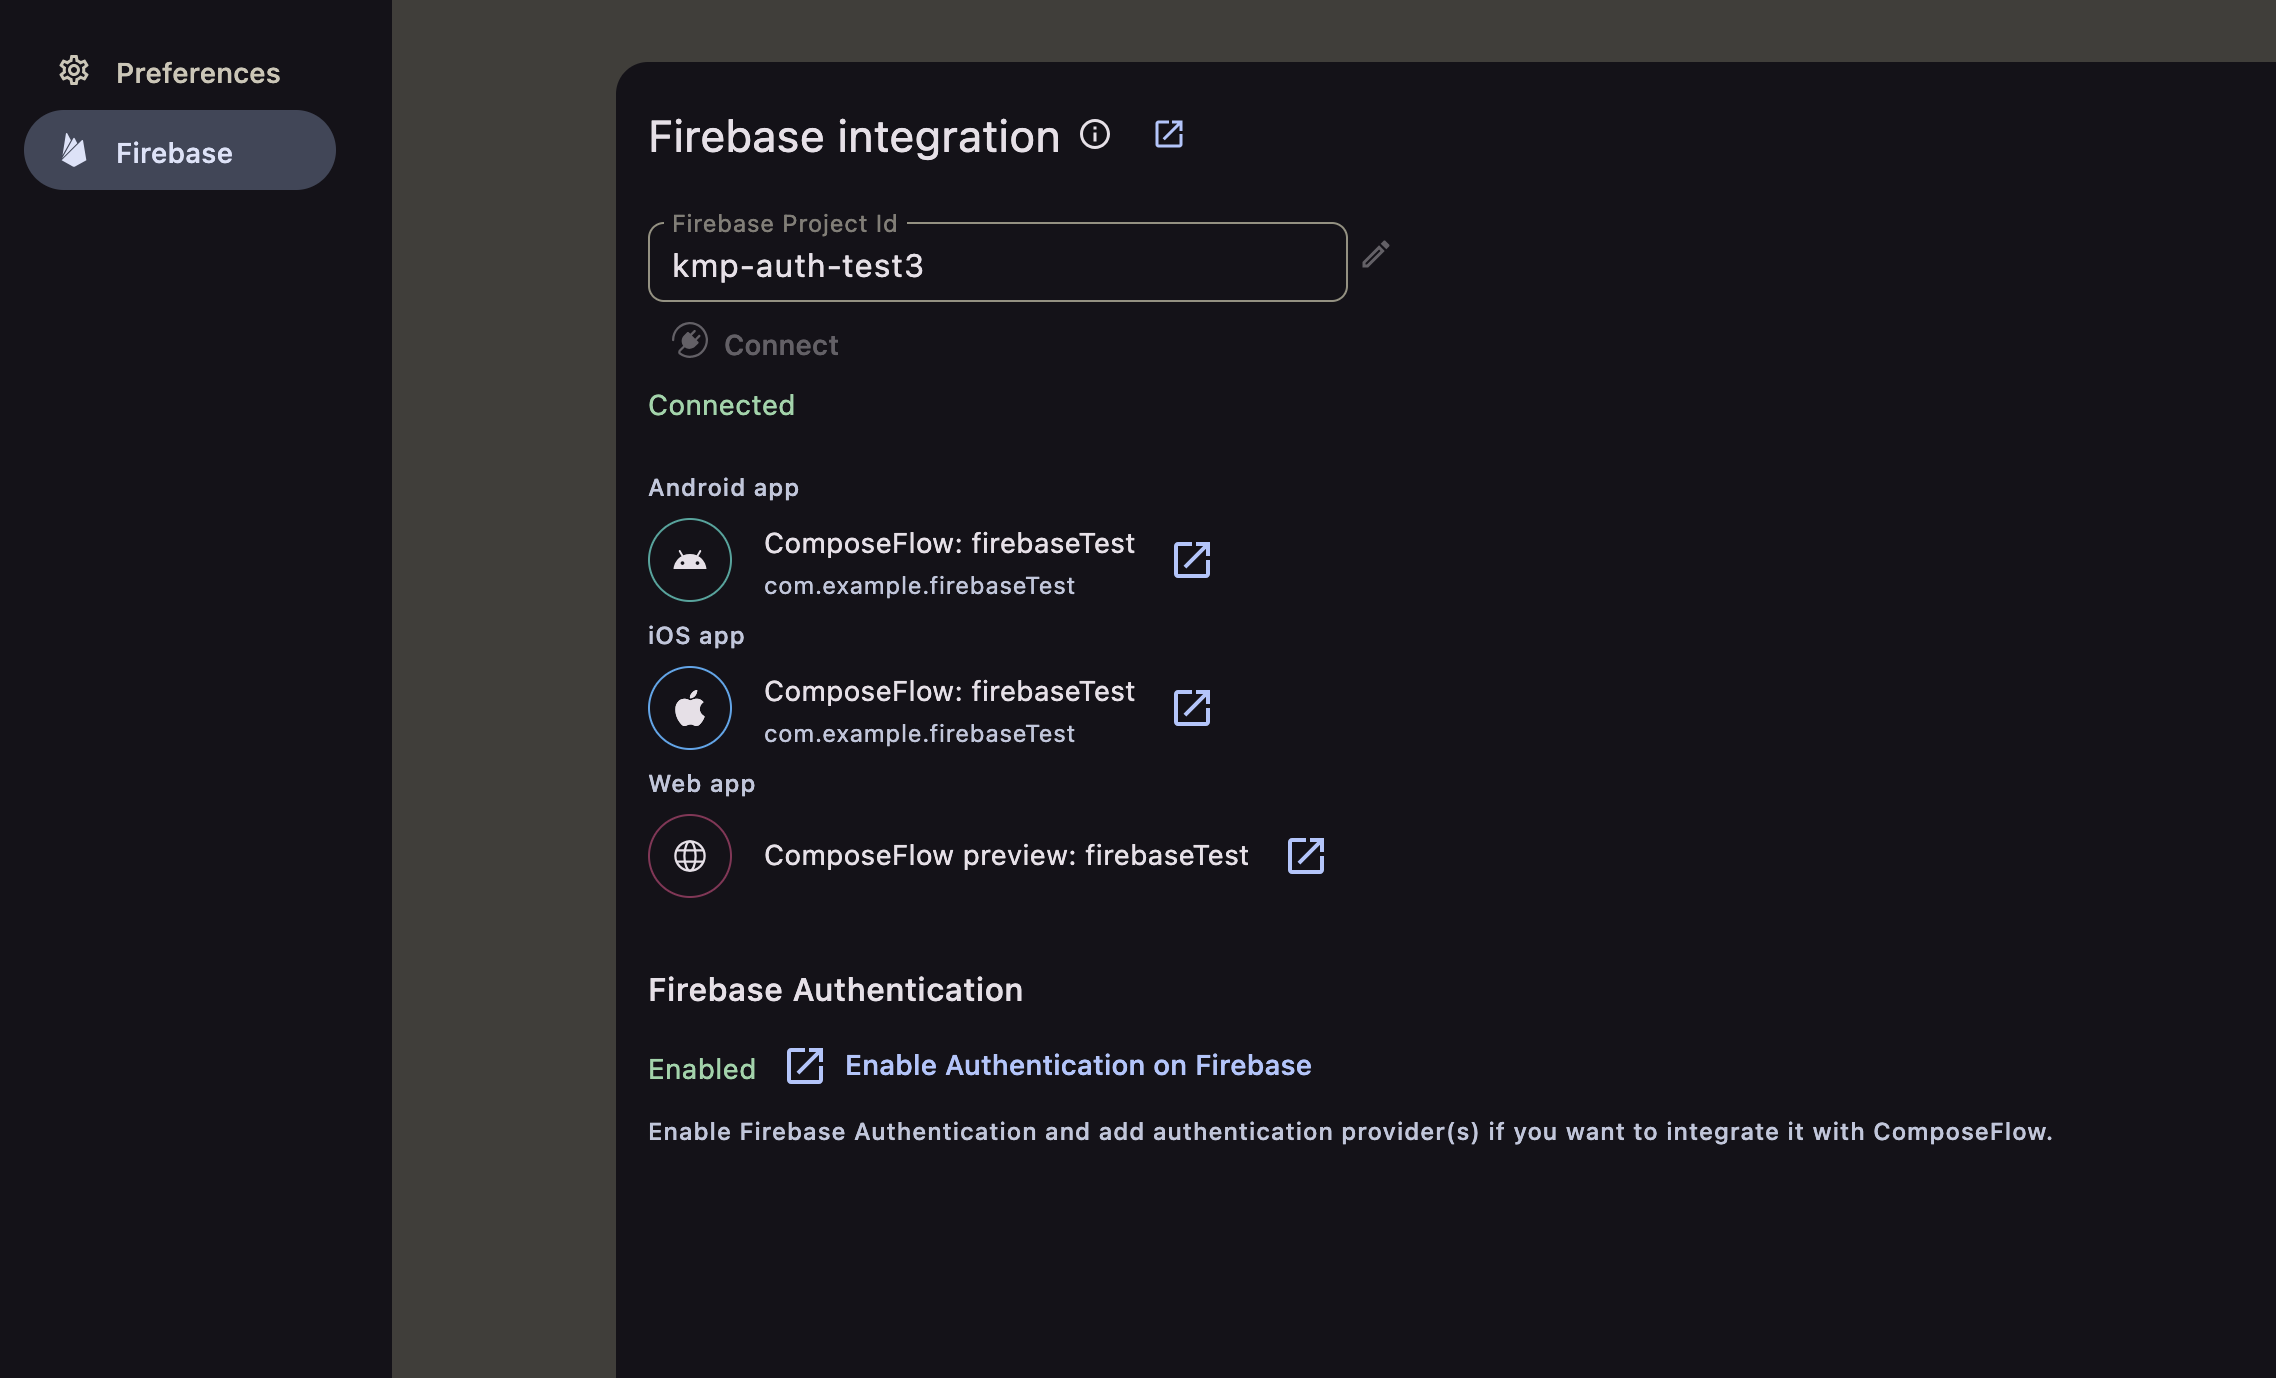
Next Steps
- Enable Firebase Services: In the Firebase Console, enable the services you want to use (e.g., Authentication, Firestore, Storage).
- Configure in DragBuilder: Use DragBuilder’s tools to integrate Firebase services into your app, such as adding authentication flows or database interactions.